Merging layers is necessary when you want to optimize the structure of your file or make several objects behave as one under your manipulations. There are several ways to achieve that.
Merge down
- Place the layers you want to merge under one another.
You can do this by simply dragging them on the Layers Panel or by using keyboard shortcut Ctrl (or Cmd) + [ or ]. Those are square brackets, usually located next to the letter P, opening Ctr/Cmd + opening bracket [ moves the layer down, closing bracket ] moves down
- Select the top layer, then right-click on the layer or select Layer > Merge Down (Ctrl/Cmd + E).
Selected layer will merge with the layer below
Note: for some type of layers, you will need to select both layers to merge. To do that, hold Ctrl/Cmd and click on the second layer.

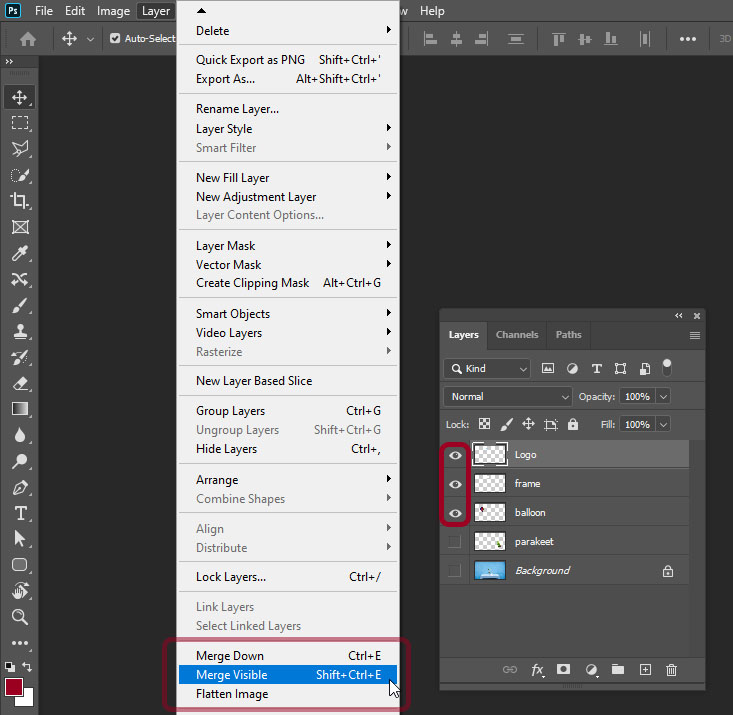
Merge Visible
This option, located next to the previous one in the same menu, will merge all the visible layers in your file. Visibility of the layer is toggled by the eye icon on the left of the Layers panel.
There are several things you need to know to make the most use out of this option.
- Click and hold left mouse button on the eye icon and drag down or up across the other eye icons of your layers to turn visibility off or on for many layers at once.
- Alt/Option-click on the eye icon to hide all other layers, besides the one you click. Alt-click again to restore visibility back to how it was.
- Select the layers you want in the Layers panel by clicking while holding Ctrl/Cmd to add separate layers to selection, or Shift to add whole range of layers between the ones you click. Then go to Layer > Hide / Show Layers.
Tip: You can also select visible layers right on the canvas, by using Move Tool with Auto-Select option turned on, and clicking on the objects while holding Shift.
Flatten entire Image
In a what’s called ‘destructive’ approach to image editing, this is the most destructive option of them all. If you have decided that you’re done with your editing and will never look back, choose Flatten Entire Image option, and it will do exactly as it promises, and merge everything into a single background layer.
Tip: Press Ctrl + Z to undo. Remember to keep back up copies of your important files.
On the advantage side, you don’t have to worry about any possible intricate interactions between blending modes, transparencies, layers effects and other such stuff. Everything will just merge into one thing exactly as it looked.
Hidden option
One of the best and most useful ways to merge layers, and just features in general, is an option that’s nowhere to be found on the Photoshop menu and only exists as a keyboard shortcut.
Press Ctrl/Cmd+Alt+Shift + E to create a copy of all your visible layers as a single separate layer. Unlike our destructive option described above, this is the opposite. Not only It doesn’t touch any of your work, it also creates its complete snapshot as a copy. Use this in combination with hiding/showing layers for most effect.
Organize into groups
If you have a complex file, clicking through visibility of the layers you want to merge at particular moments in the process of your work can become pretty cumbersome. This is where organizing layers into groups will aid merging, and not only that.

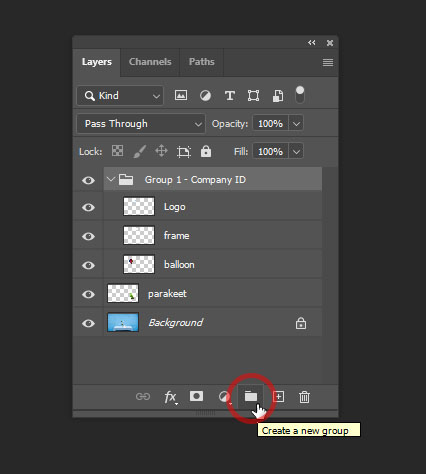
To put several layers into a group:
- Select the layers you need by holding Ctrl/Cmd or Shift and clicking on them in the Layers panel.
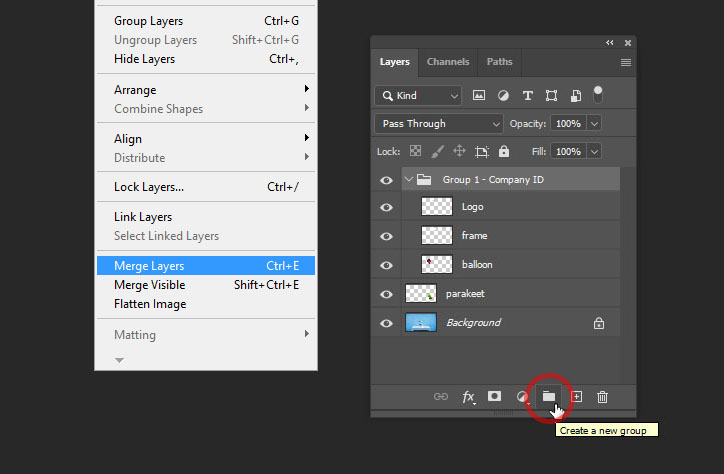
- Click on the Create Group button, or go to Layer > Group Layers, or press Ctrl + G.
Note: older versions of Photoshop may require you to hold Shift while clicking the button to put the selected layers into the newly created group right away.
You can also create groups of other groups or combinations of layers and groups and so on. Click on the arrow next to the group icon to expand or collapse.
Now, you can simply select the group you want and press Ctr/Cmd + E to merge all the layers in that group.
Tip: You want to keep the copy of your unmerged layers. To do that, drag your group to the New Layer button in the Layers panel.
