
As with many things, there are plenty of ways to make a collage but we’ll use the easiest and most effective one.
- Create a new document of the format you need – one of the print or web formats or a specific resolution. You can always adjust it later by going to Image > Image / Canvas Size.
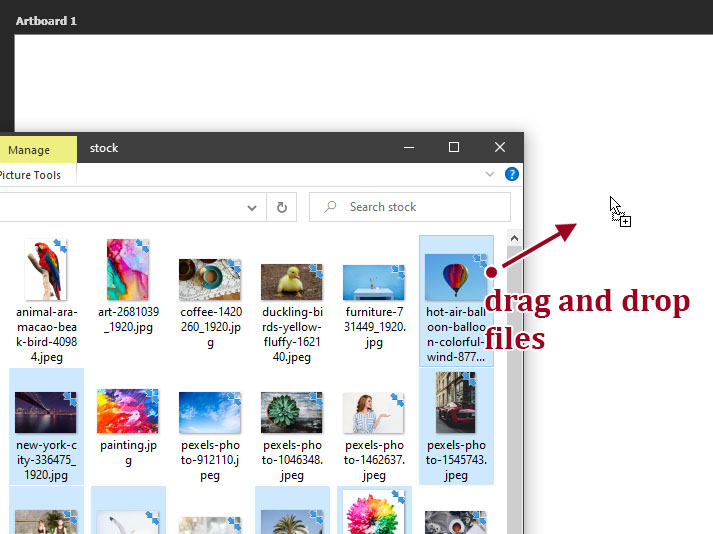
- Open your files explorer and browse to the images you’re going to use in your collage. Select the ones you need by holding Ctrl/Cmd and clicking on them.
- Drag and drop files right onto the document you’ve created.
Photoshop will load them one by one, while letting you to place them on the canvas. Roughly position each one where you want, pressing Enter to confirm and move to on to the next one.
Tip: if you don’t want to load images one by one use Files > Scripts > Load Files into Stack. Check Create Smart Object after Loading Layers to keep their quality unaffected by resizing back and forth.
Once they’ve all loaded up, you can start working on arranging them into the composition you want, if you haven’t already done so on first try.
Placing images
- Select Move Tool on the Tools Panel or press V on keyboard. In the options bar at the top, check Auto-Select and Show Transform Controls.
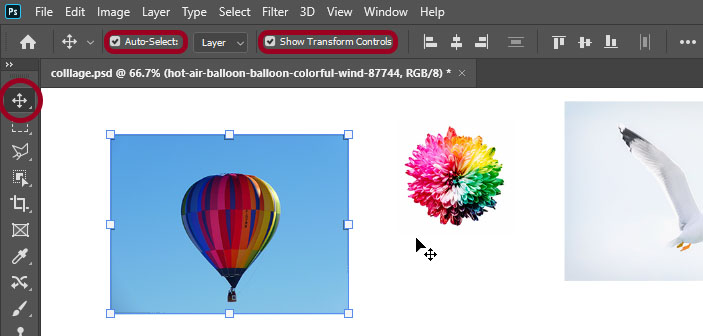
You can now simply click on images and drag them around and resize them by grabbing them on the corners. In older versions of Photoshop, hold Shift to keep images’ proportions while you resize. Double-click or press enter to apply images’ transformations.
- By default, Photoshop will snap images to their edges. If it doesn’t or I you don’t want it to, select View > Snap. You can also override snapping by holding Ctrl.
- Also by default, Photoshop shows Smart Guides – purple lines that help you align images. Enable or disable them in View > Show > Smart Guides.
Background and borders
- If you need any background color other than the default white, click ying-yang-looking button on the Layers panel and select Solid Color. Choose color and press OK. You can change this color later by double-clicking on this layer’s icon. Next drag the layer below your images on the Layers panel to make it your background.
- Right-click on any of your image’s layer on the Layers panel and select Blending Options.
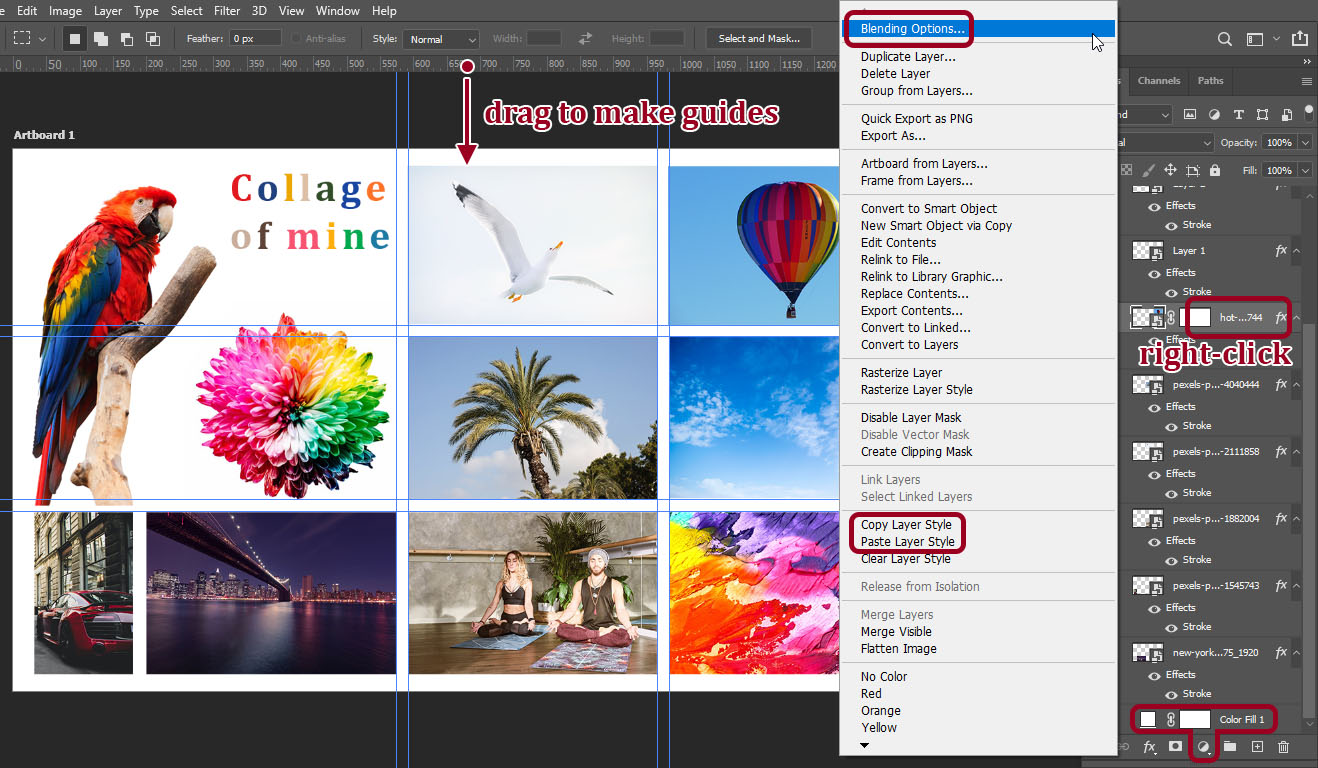
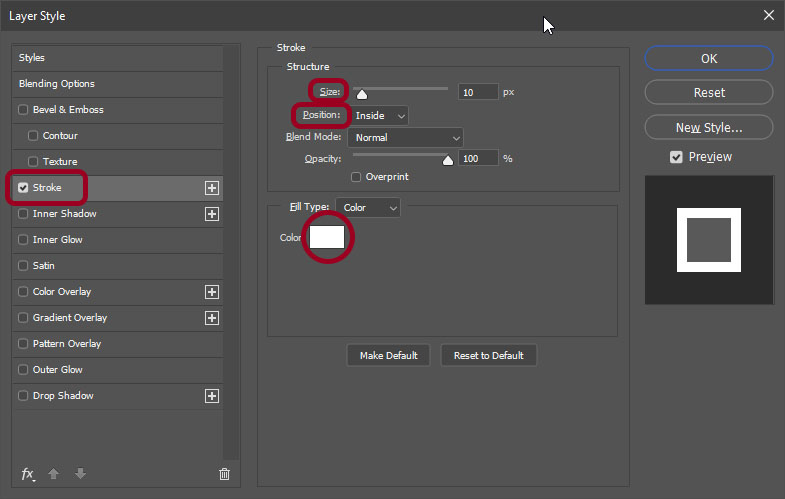
On the left side of the new dialog, select Stroke. In the options, for Position, select Inside, then choose any size and color that you want. These strokes will serve as borders of your images.
- Right-click on the layer again and click Copy Layer Style. You can then select layers that you want holding Ctrl/Cmd, then right-click and choose Paste Layer Style to apply these strokes to all the other images.
Guides
To help layout your collage you can set up guides to align your images to.
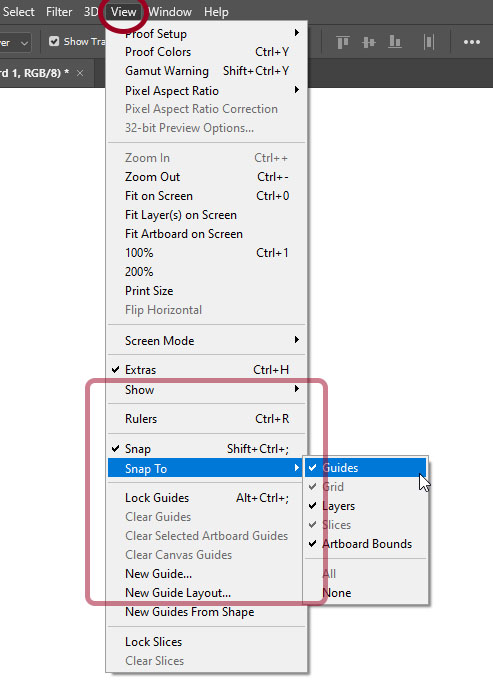
- Press Ctrl/Cmd + R or go to View > Rulers to bring up rulers if you don’t have them enabled already.
- Click and drag from the ruler onto the canvas to create guides. Hold Shift to snap guides to rulers’ marks to help with more even placement. You can move guides using Move Tool, drag them back on to the ruler to remove them. In View > Snap To, make sure Guides are checked, and Snap itself is enabled.
Tip: go to View > New Guide Layout to create automatic guide layout broken into rows and columns.
Adding text
To add text:
- Press T or choose Type Tool on the Tools panel.
- Click anywhere on the canvas to create the text layer, type your text and press Ctrl + Enter or Escape to confirm.
- Go to Window > Character / Paragraph to enable panels responsible for formatting text size, font, color and so on.
Knowing these basics is enough to easily create beautiful collage. Use Move Tool, create guides, and arrange your images, adding simple effects if you want and you’re good. Go to Files > Save As to save your image.