This tutorial is for Photoshop version CC 2020, if you have Photoshop CC 2018 or older, the workflow will be different in some aspects that we’ll mention.
Here we’re going to review how to add them to your Photoshop and use them, and also how to create and add our own brushes.
Since Photoshop version CC 2018 Brushes are organized in a new way, with different sets stored in groups or folders, while in older versions there were presented in a single list, to which you added new brushes. The main difference now is that importing new sets of brushes creates new folders with those brushes, which in a way, is easier.
Adding brushes from files
Photoshop Brushes are stored in files with the format extension .abr, which you can find plenty on the internet.
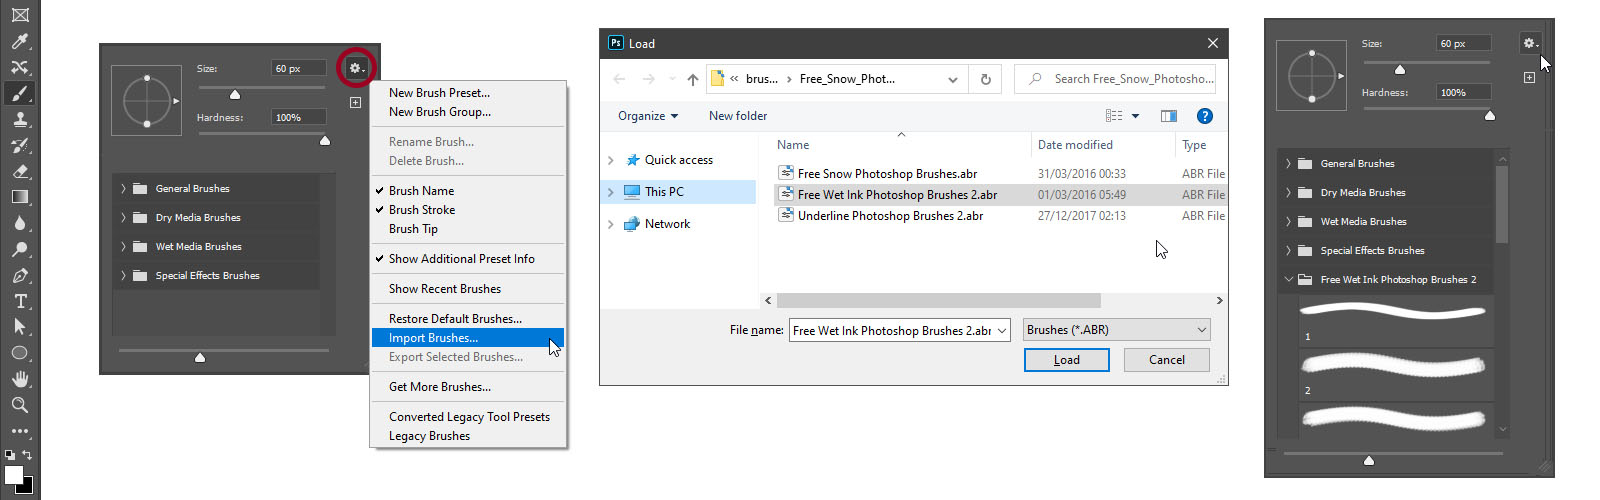
- First, to see the brushes that you already have, go to Window > Brushes to open up Brushes panel. You can also right-click (Ctrl+click on Mac OS) on the canvas with Brush Tool active to open context menu which also holds the brushes list.
- In the top-right corner of the Brushes panel, you will see a ‘hamburger’ button (or gear icon button in the right-click context menu) which opens up panel’s options. Here you can change the way your brushes are displayed, as a stroke or a brush tip or both.
- Click Import Brushes (in older versions – “Load Brushes…” or “Replace Brushes”)
- In file browser dialog, navigate to your .abr brushes file, select it and press Load.
Tip: you can simply double-click on the file in your file explorer and if the .abr extension isn’t taken by another program it will automatically be imported into Photoshop.
At the bottom of the list you will see a new folder, click on the arrow to the left to expand it. If you’re browsing through the right-click context menu, double-click on a brush to select it and close the menu.
Legacy brushes
If you want to add the brushes that were available in the previous versions of Photoshop, open up Panel or context menu’s options again and find Legacy Brushes near the bottom. They will be loaded as a set of folders at the bottom of the list.
Add a ton of brushes
If you have a whole library of brushes and want to add them all at once, you can navigate using file explorer to where Photoshop stores brush presets and copy your .abr files there.
Directories are:
On Windows: C:\Users\(YourUsername)\AppData\Roaming\Adobe\Adobe Photoshop 2020\Presets\Brushes
On Mac OS: Users/(YourUsername)/Library/Application Support/Adobe/Adobe Photoshop
But those directories may change depending on your version of Photoshop.
There is an easier way – simply drag and drop all your brushes files onto the open Brushes panel.
Add your own brush
There are two main parts that comprise your own brush: brush tip shape and brush settings.
Go to Window > Brush Settings or press F5.
This will open the Brush Settings panel which has a lot of different settings which you can play around with. You can create a new brush with one of the existing brush tip shapes, which are at the top of the list of settings. But to have truly your own brush, you might want to create your own brush tip shape.
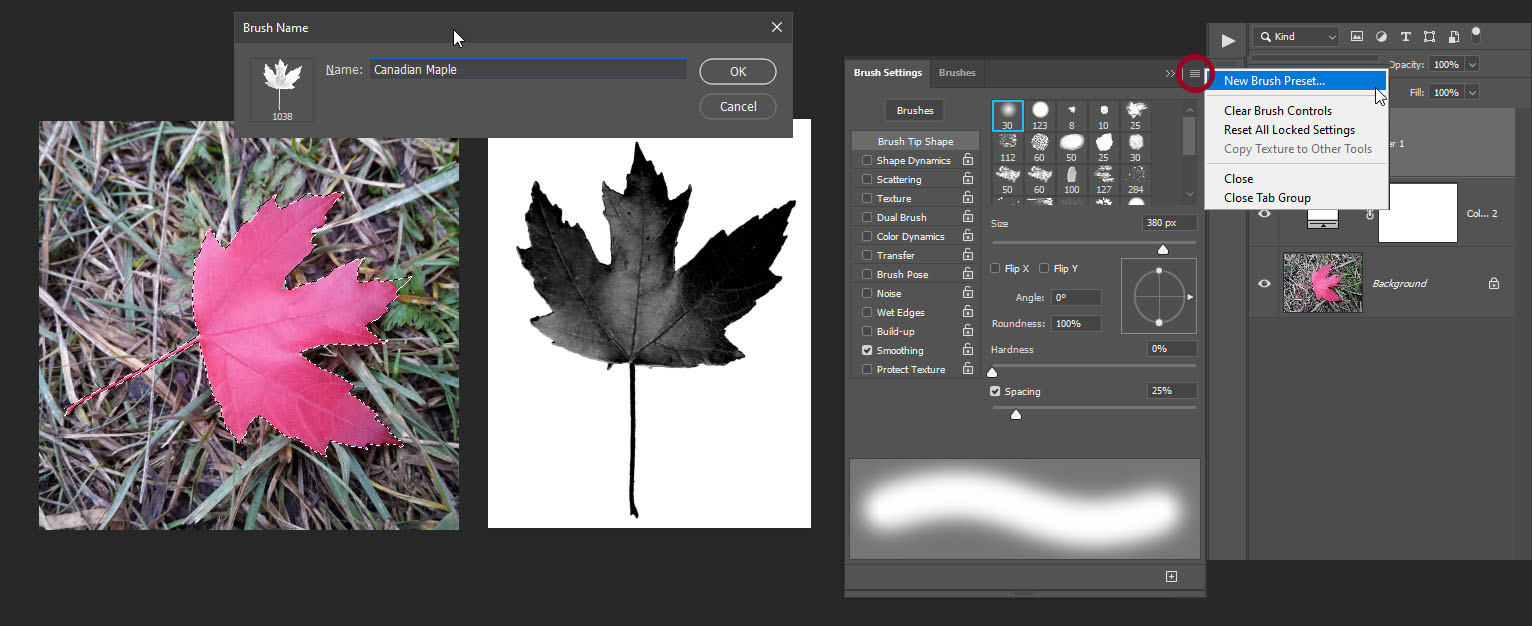
- Create a new document or choose an area in your existing one where you will draw/extract your brush tip shape.
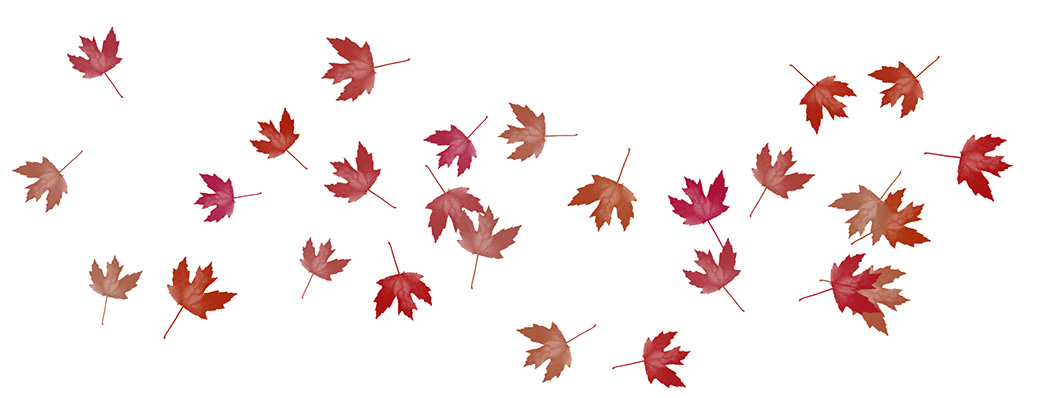
- Create you brush tip shape with whatever tools you like, remembering that the shape itself will be defined by non-white non-transparent pixels.
That is, you can paint with black over white or black over transparent, and the shape that you draw will be your brush tip shape. Shades of gray will be semi-transparent components of your brush tip, same applies for colored pixels, their brightness will define transparency.
- Pick Rectangular Marquee Tool and select the area around your shape.
Note: if you draw your shape on a transparent layer, you don’t need to make a selection with Marquee. Defined tip will use shape’s own non-transparent boundaries.
- In Brush Settings panel options, click New Brush Preset, or go to Edit > Define Brush Preset, give it a name and press OK.
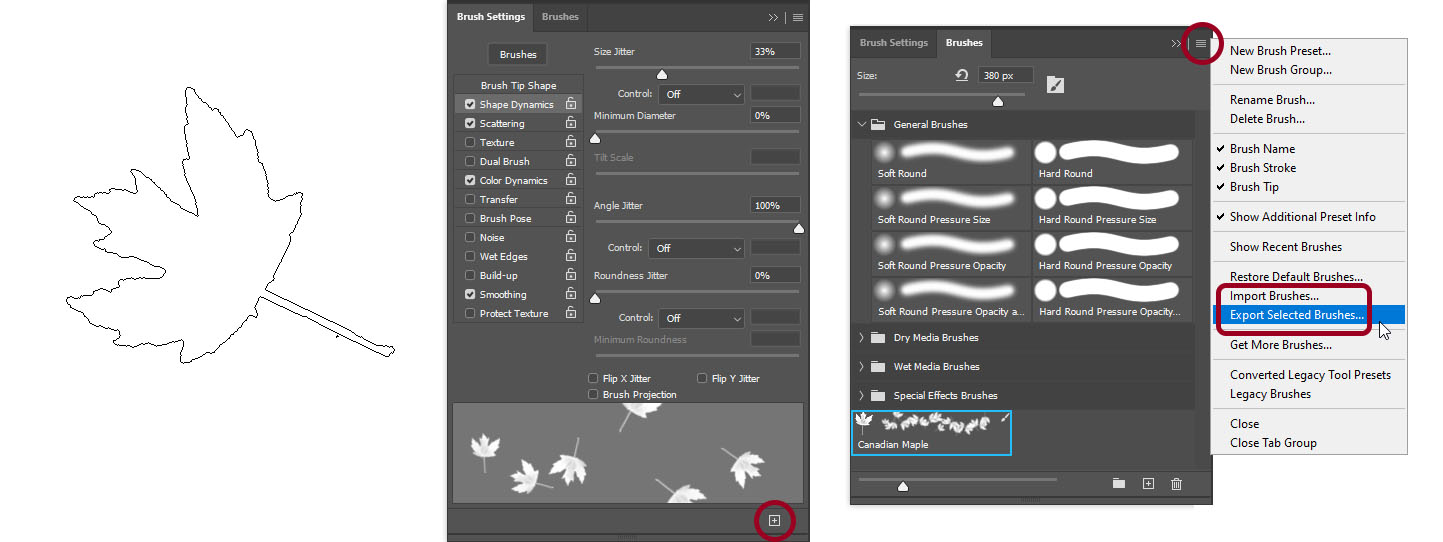
You’ve added your own Brush Tip Shape, now you can tweak any brush settings you want and click Create New Brush button at the bottom of the Brush Settings Panel.
Then go to Brushes panel, click top-right hamburger icon for options, and choose Export Selected Brushes to make your own .abr file.