Feathering is an easy way of blending an image into another image or background by softening the edges. Extracting something from background properly takes time and skill, but is not always necessary or may not even be the desired effect. This is where simple feathering comes to help.
There are several ways to do it in Photoshop, let’s review the typical approaches.
Feather your selection and use it
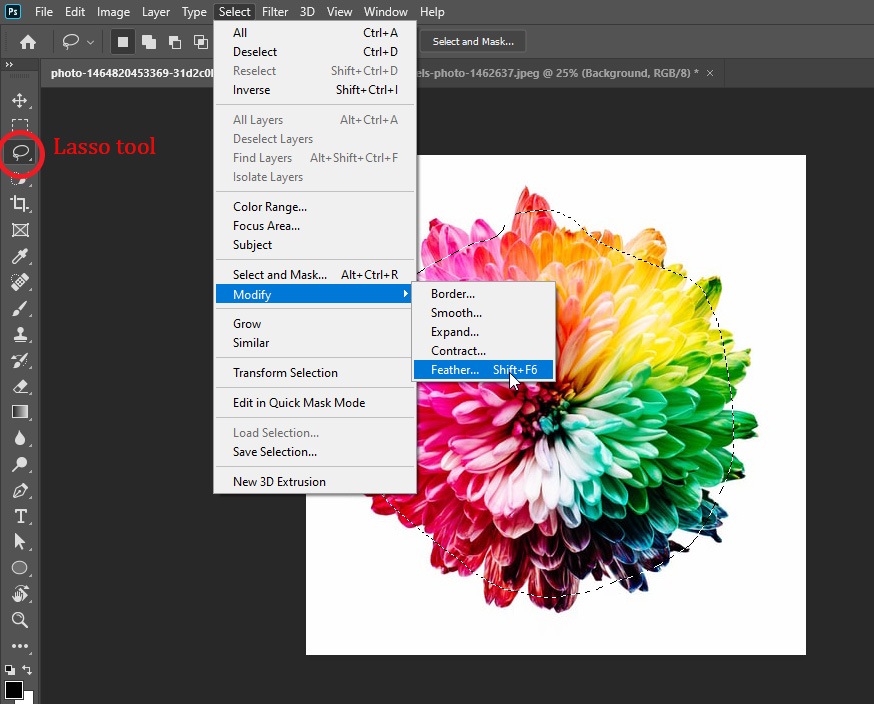
- Make a selection using any selection tool – a simple Lasso will do. Draw a line roughly around the object.
- Go to Select menu > Modify > Feather…
- Input the Feather Radius value, for example 30 pixels, and press OK. The bigger the radius, the softer the edge.
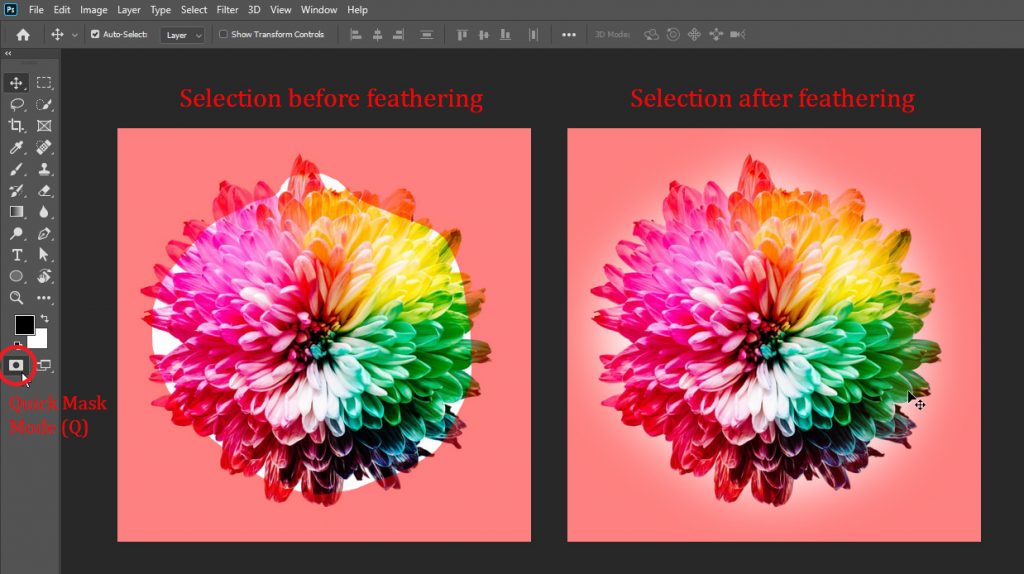
Now, though the shape of your selection outline may not noticeably change, your actual selection now has a softer edge. If you press Q (Quick Mask Mode), you can see how it really looks like.
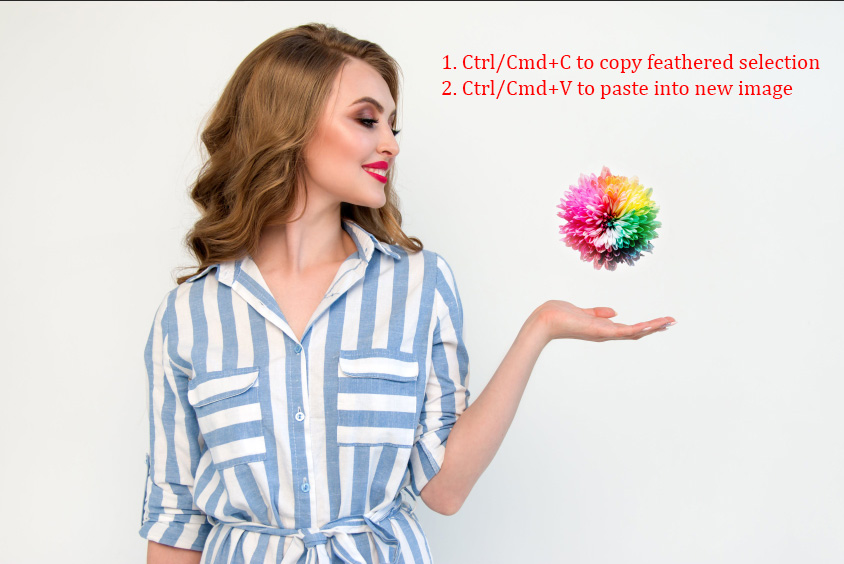
Now you can use that selection, for example, by drawing with a brush inside of it, or by simply copying and pasting your selection into another image. Press Ctrl/Cmd + C to copy, Ctrl/Cmd+V to paste.
Select and mask
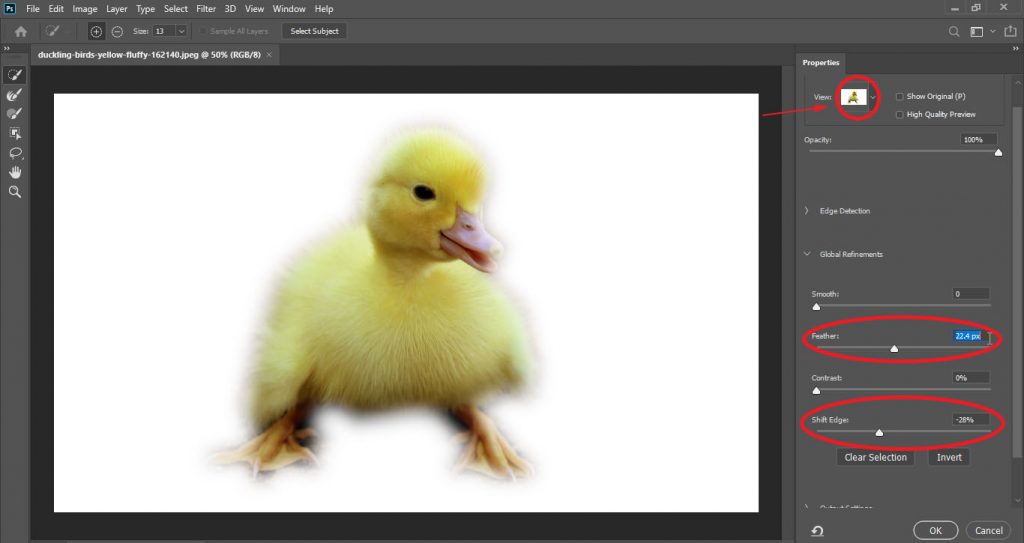
Newer versions of Photoshop have a handy feature that lets you see and adjust the feathering of your selection in real time on a variety of backgrounds. In the newest versions of Photoshop it’s called Select and Mask but it may also be called Refine Selection in older versions. It appears at the top of the Options bar when you have any selection tool active.
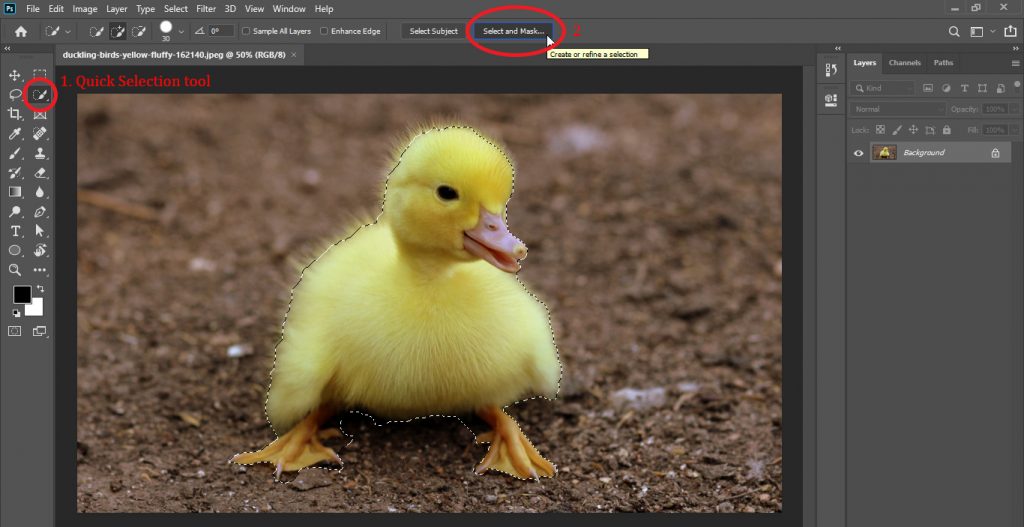
- Make an approximate selection using any selection tool: Marquee, Lasso or, for example Quick Select tool.
- Click Select and Mask.

A new panel will appear, where you can select the view with a different background – it’s useful to check how your image will blend with light as well as dark backgrounds.
- Adjust the feather slider to increase or decrease the radius of your selection edge. Other sliders are also useful – particularly the Shift Edge slider that allows you to offset the edge towards the outside or the inside of your selection.
- Press OK, and now your selection is ready to use.
Layer Mask and brushes
Speaking of ways to use a selection, one of the most common and most useful ones is to create a Layer Mask and adjust it as you please.
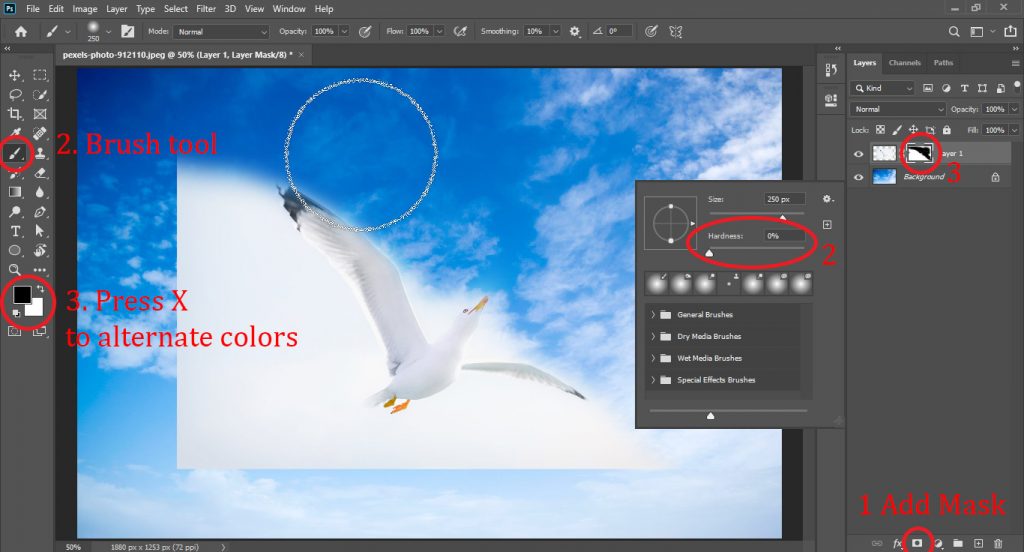
- Select a layer you want to blend in and click Add Mask button at the bottom of the Layers panel. If you have made a selection prior to adding a mask, this selection will be used as initial mask.
- Select the Brush Tool (B) on the Tools bar and right-click anywhere on the image to bring up Brushes context menu. Set the Hardness parameter closer to zero to make the brush softer.
- Draw on the layer mask with a black brush to hide parts of the layer you want to remove. Use white color to reveal parts of the image back in. Make sure you are drawing on a Mask, not layer itself, by checking that mask icon is selected.
Use your inner glow
This is a creative way to blend images that are already cropped, onto the backgrounds of uniform color.
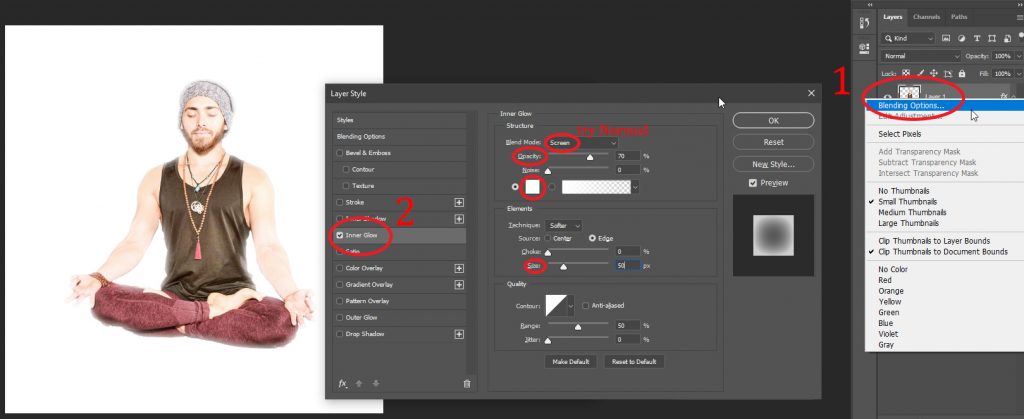
- Right-click on the layer and select Blending Options.
- Turn on Inner Glow effect.
Instead of Screen Blend Mode, try using Normal. Adjust the Size, Opacity and Color. After bringing up Color Picker for the color, you can simply click on the backround of your image to select that color. This way, background and glow colors will match and will blend into each other smoothly, creating a seamless image.