When it comes to blending images, you can do one of the two things:
- Blend two entire images together uniformly
- Transition from one image into another in a variety of ways
The second is more difficult, so let’s begin with blending through transparency and blending modes.
Blending images using transparency
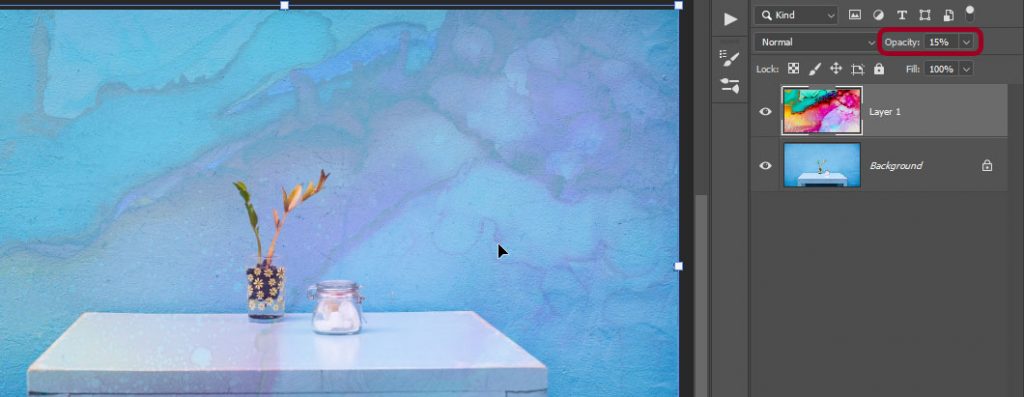
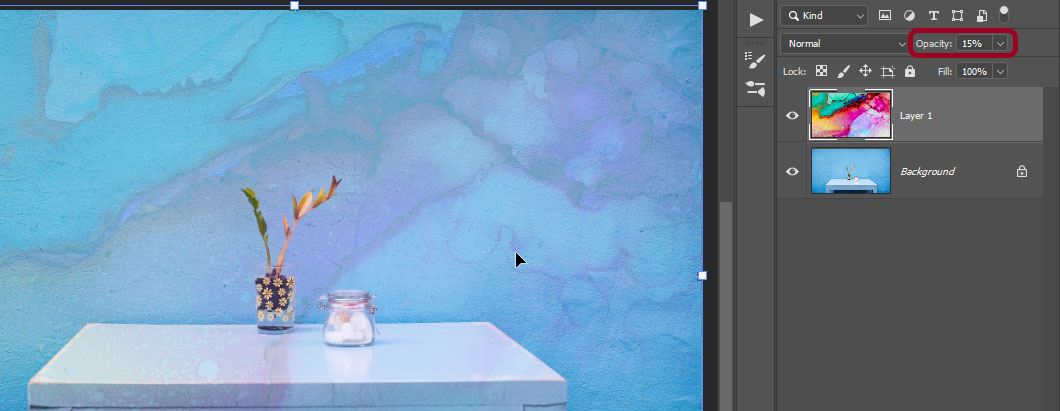
In Photoshop, transparency is defined through its opposite – the Opacity parameter, which by default is at 100%, meaning completely opaque. We need to change that.
- Paste your image on top of the image you want it to blend with. Just open both files and do Edit > Copy on one and Edit > Paste on top of the other.
- Go to the Layers panel and select the top Layer.
If you don’t have the Layers panel visible, go to Window > Layers or press F7.
- Adjust the layer’s Opacity parameter. You can do this by simply dragging your mouse over the word Opacity in the top-right corner.
Blending using Blending Modes
Notice to the left of the Opacity slider is a menu that says Normal. This is the default blending mode, which by itself does nothing. But if you select a different one, as the name suggests, it will blend your image in a different way.
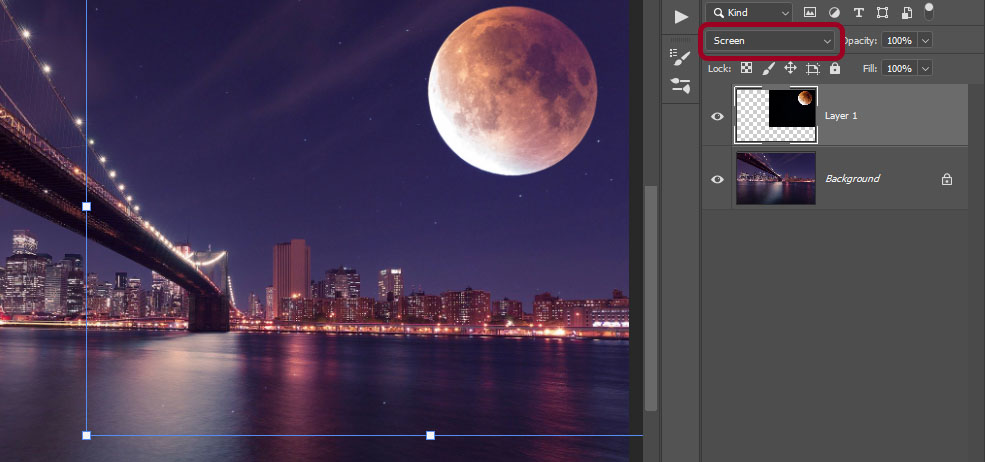
Open the menu by clicking on it, and you will see a list of different blending modes.
There’s no need to go into details which mode does exactly what, you can simply go through them to see which one suits you better. But to help with that, you can notice that they are divided into categories. One category blends in darker parts of the image (Darken, Color Burn etc.), another one blends in lighter parts (Screen, Linear Dodge and others), third one does a mixture of both (Overlay, Soft Light, Hard Mix) and the rest of em just do strange things that you probably won’t need at this point.
Create a copy of your layer by dragging it onto the New Layer button, and try a different blending ode on that copy. Combine them with various Opacity degrees to reach desired effect.
Blending using Layer Masks
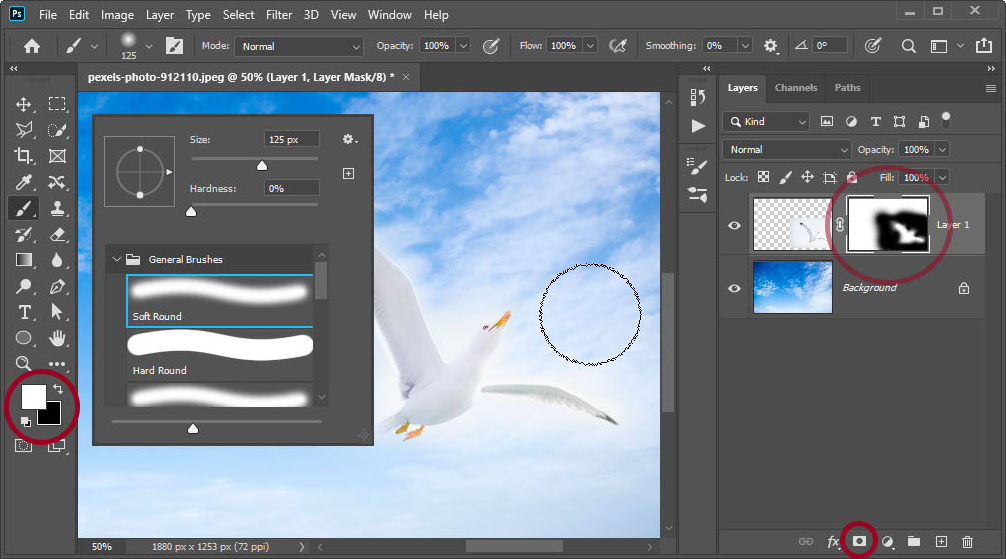
When you need to create transitions between parts of the images, simple opacity won’t help and blending modes might not be enough. You will need to create a Layer Mask to tell layer which part of it you want to blend in.
- Select your top layer and return it to Normal blending mode with 100% Opacity.
- At the bottom of the Layers panel, click Add Layer Mask button, or go to Layers > Layer Mask > Reveal All. A new white icon will appear next to the layer’s thumbnail. If you see brackets around this icon, that means you’re drawing on the layer’s mask, not the layer itself.
- Press G to select Gradient Tool and at the top, select basic black to white gradient.
Now draw with the Gradient Tool across your image. The image will now fade in from transparency and the layer mask’s icon will show a gradient. Draw a gradient in a different direction to change the transition.
Layer masks work very simple. Black areas hide the layer and white areas reveal it, while shades of gray act as degrees of transparency. You can paint the layer’s mask with any painting tool.
- Select Brush Tool (B on the keyboard).
- Right-click on the canvas to bring up context menu, and select soft round brush.
- Press D to reset your foreground and background painting colors to the default black and white.
- Paint with the brush on the layer mask, and notice how black brush hides part of the layer. Press X to switch to white color, and paint to see hidden parts of layer appear again where you paint.
Change your brush’s size using bracket keys [ and ] on the keyboard, switch colors back and forth using the X key and paint on the layer mask to blend in the image however you see fit.