If you need to crop a photo, Adobe Illustrator really is NOT the best program to do that. You can do it but it’s best to use Photoshop instead.
However, if you need to crop your vector artwork or an embedded image, or simply have no other options, there are several ways you can do it in Ai.
Crop Image
You can use Illustrator’s simple built-in functionality to crop raster images (photos or other images made of pixels).
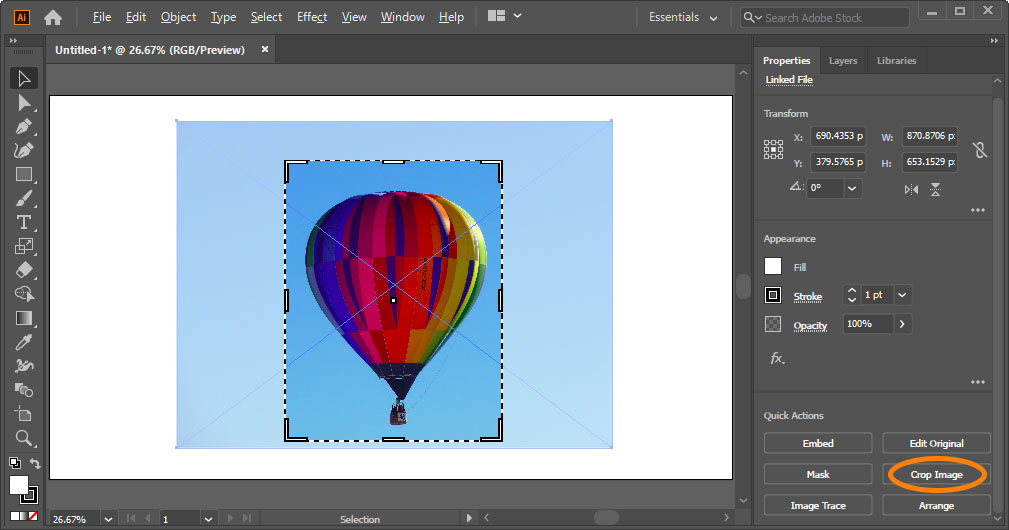
- Select your picture.
- Click Crop Image on the Properties or Control panel.
If your image is a link to the file, Illustrator will warn you that cropping it will embed the image. Meaning that it will create a (cropped) copy and save it inside your Illustrator file. The original image will not be affected by and will not affect the image inside your artwork. - Adjust the cropping frame by dragging its edges, corners or the inside of the frame itself.
- Click Apply.
Mask Image
Using Mask you will crop everything to a vector path without affecting the image itself, allowing you to maintain links to your images and not embed them. Also, this way you can readjust your framing of the image with ease.
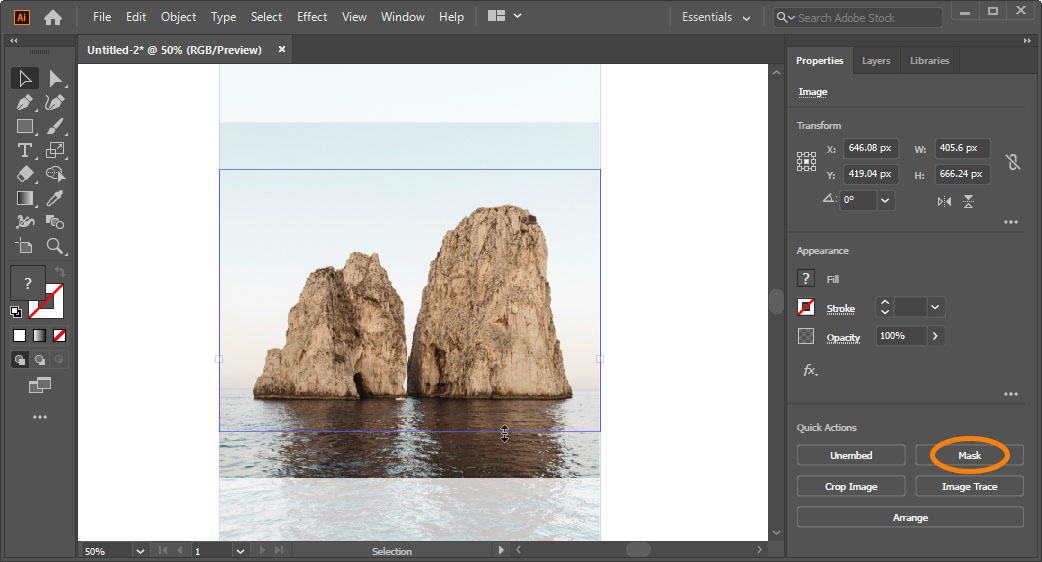
- Select image and click Mask button located next to the previously discussed Crop Image button.
- Using Selection Tool (V), adjust corners or sides of the bounding box to frame the image.
Tip: You need to make sure you’ve not accidentally selected your image itself, only the mask’s vector path. This can be tricky – linked image will show a diagonal cross indicating its selection but embedded image will not. Check on the Layers panel (Window > Layers, or F7 key) if your image is selected – selected art is indicated by a colored box on the right. Switch to Direct Selection Tool (A), or hold Ctrl/Cmd to temporary switch) and Shift-click the image to deselect it, or alternatively, in the Layers panel, Shift-click the aforementioned colored box on the right.
Clipping Mask
The vector path that we were adjusting in the previous method actually was an automatically created rectangular clipping mask, but you can create your own. Not only it’s often times easier to select the area you want to crop, you can make it any shape you want and it will work with any artwork.
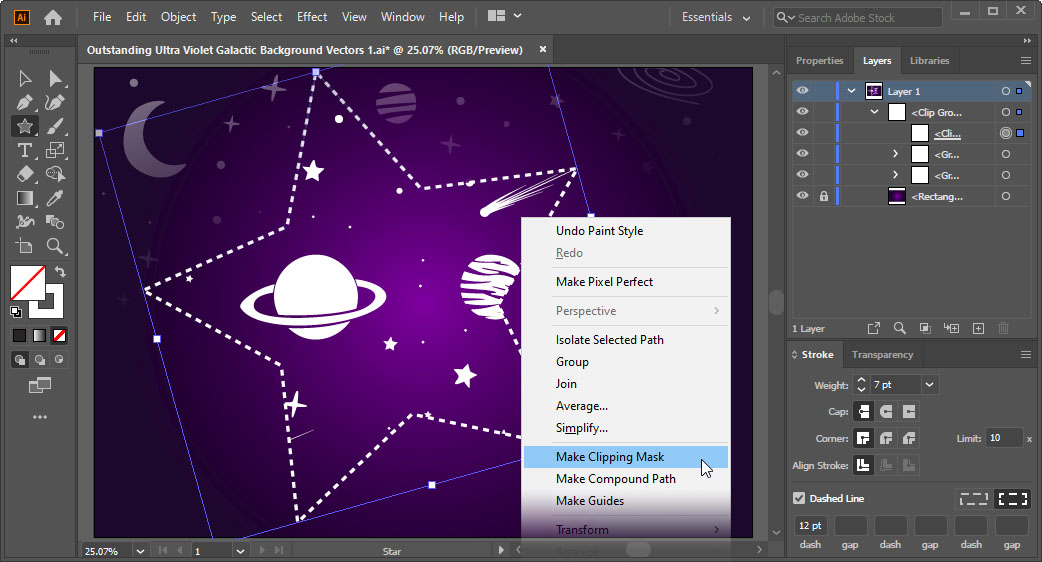
- Create a shape you want to crop your image or artwork to.
You can use simple Rectangle Tool (M) or draw or use any vector path including live editable text. - Make sure the vector path is on top of the image or artwork you want to crop.
By default, any shape you create will be put at the top of the layer, but if you are using an already existing shape, check on the Layers panel. Drag it on top of your artwork or select it on the canvas, then right-click and select Arrange > Bring to Front (alternatively go to Object > Arrange). - Select your image or artwork together with the shape at the top. Use Shift-click to add to selection.
- Go to Object > Clipping Mask > Make or press Ctrl/Cmd + 7.
Illustrator will crop everything you’ve selected using the topmost shape which will become a Clipping Mask. Everything that was selected will now be components of the Clip Group which you can select and edit separately, including the Clipping Mask which will have underscored name in the Layers panel. Mask itself now doesn’t need to be at the top and can have its own stroke and fill and so on.
In short, to crop this way, you need to draw a shape, select it both with your image/artwork and press Ctrl/Cmd + 7. Use Direct Selection Tool (A) to adjust the mask.