Clipping mask is a vector shape used to hide the visibility of objects in Illustrator. You can use it to clip the visibility of any object or combination of objects up to the entire artwork.
Make Clipping Mask
To make a new clipping mask do the following:
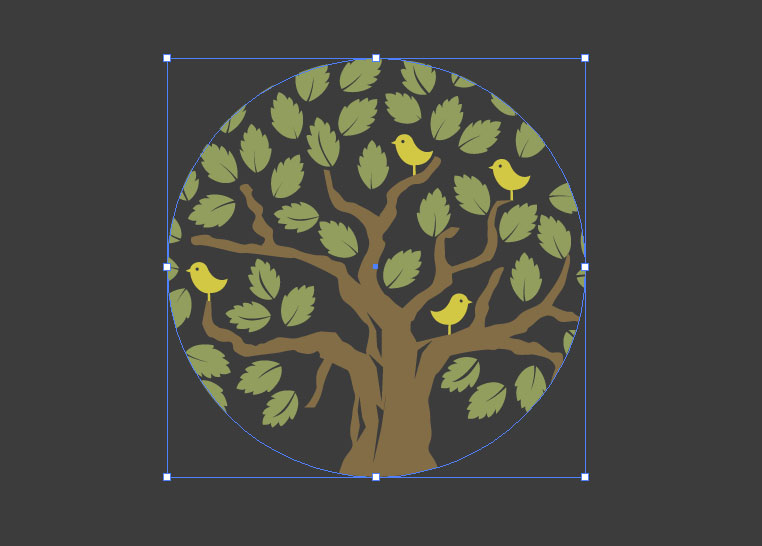
- Create or copy and paste any shape you want your objects to be clipped to.
This can be, for example, a rectangle or a circle, but also any shape. Certain types of objects may not work until they are expanded (Object > Expand) into regular paths, but compound shapes and groups will work, as well as editable text.
- Make sure your shape is above the objects you want to mask.
If you’ve just created or pasted it, it most likely will be. By default, new objects appear at the top of the active layer, but you might have other layers that contain objects you want to mask. Open the Layers panel (Window > Layers, or F7) and check. If you have too many objects, click the Locate Object button to find the one you have selected.
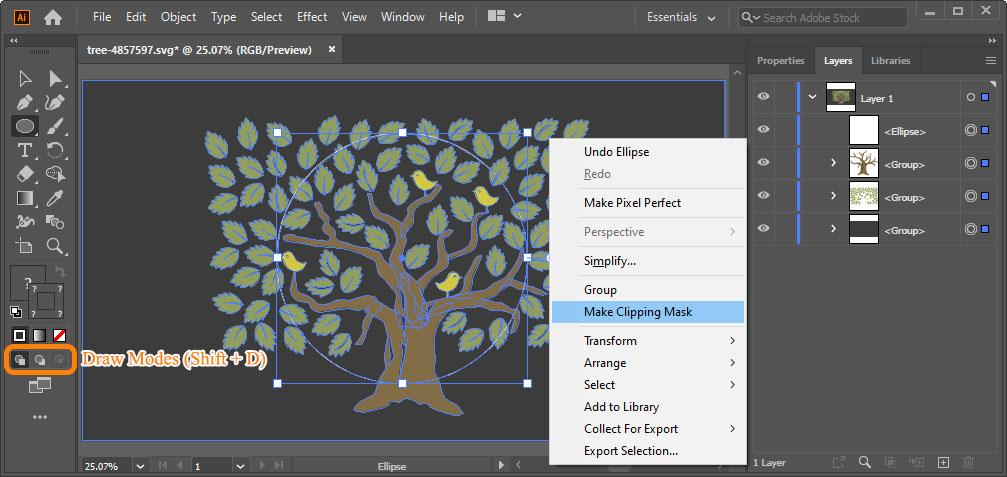
Also, look at the bottom of the Toolbar, between Filling options and Screen Mode – there are buttons responsible for the Draw Modes than you can switch between by pressing Shift + D. If yours is set to Draw Behind mode as opposed to the default Draw Normal mode, new objects will appear below selected objects or at the bottom of the layer. And by the way, the third mode – Draw Inside – will make a clipping mask out of your selected object automatically once you start drawing or creating objects.
Go to Object menu or right-click and select Arrange > Bring to Front to send the selected object to the top of the layer.
- Select your objects together with the mask object. Shift-click with the Selection Tool (V) to add objects to selection.
- Go to Object > Clipping Mask > Make, or press Ctrl/Cmd + 7.
All of the selected objects will be put into a Clip Group, which is like a regular group with one of the objects – the one that was at the top – assuming the role of the Clipping Mask.
Editing the Clipping Mask
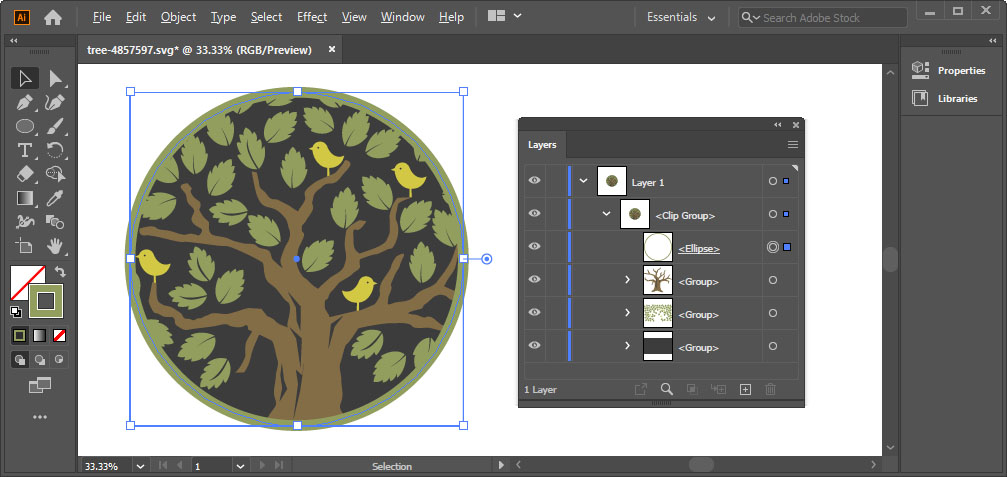
Clipping Mask (also called Clipping Path) is indicated with an underscore in the Layers panel. Now that the Clip Group is created, the mask object doesn’t have to be at the top, you can click and drag it to any position within the group.
You can edit it like any regular path, select it by 1) clicking on the circle next to it on the Layers panel 2) using the Direct Selection Tool (A) and clicking object’s center or Alt/Option-clicking the path 3) using the Selection Tool (V) after double-clicking the group and entering Isolation Mode.
The original object’s fill and stroke are removed once it becomes the mask, but you can add them back. You can also duplicate the original in advance by copying it and then going to Edit > Paste in Place, or pressing Ctrl/Cmd+Shift + V.
To release the Clipping Mask, right-click on it and choose Release Clipping Mask or press Alt+Ctrl + 7 (Option+Cmd + 7 in Mac OS).
Tip: hide the visibility of the clipping mask to reveal its contents (click the eye icon next to the Clipping Mask on the Layers panel).
Layer-level Clipping Mask
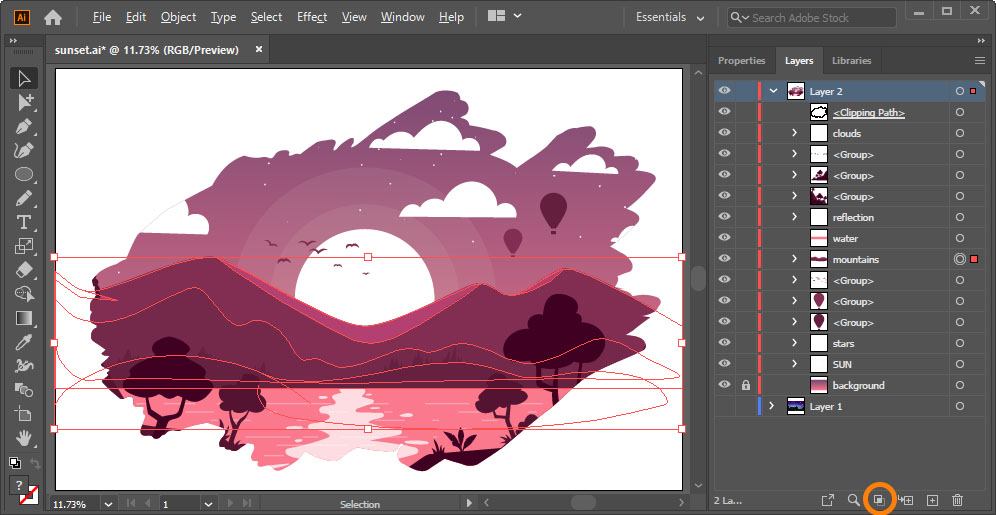
Layer-level Clipping Mask can be noticeably more convenient since it’s not attached to a group and the regular Selection Tool acts on the objects and the mask separately. You can select and move objects as usual and the mask will stay in place, and vice versa.
- Put the masking object at the top of the layer as before.
- Select the layer on the Layers panel.
- Click Make/Release Clipping Mask button.
There’s no need to select any artwork. You can also simply drag any existing clipping mask from any group on top of the layer (or back).