By default, Illustrator’s background is shown as white, which doesn’t allow you to see whether some of your objects themselves have white background or transparent. And unlike in Photoshop, there is no background layer that you can turn off or delete to see transparency. You would have to check by placing something with a color fill behind your objects, and sometimes change that color several times to check different objects, which can be a hassle.
But, there is a way to see transparency the same way as in Photoshop, it’s called the Transparency Grid.
 Go to View menu > Show Transparency Grid (Ctrl/Cmd+Shift + D).
This will let you see your artwork’s transparency situations as it really is, because if you export your file in a transparency-enabling format such SVG, PNG or GIF, it may be saved without the white background that you see regardless of whether the Transparency Grid is disabled.
Tip: if your artwork happens to be a checkerboard or otherwise not working with the default transparency grid, you can change it by going to the File > Document Setup.
Saving Files
Despite the fact that Illustrator only shows you white background by default, not necessarily creates it, it still might decide to fill your image with white on the exporting stage. Check for the options in the Save or Export dialogs.
Note: JPEG format doesn’t support transparency. Use PNG (raster format) or SVG (vector format).
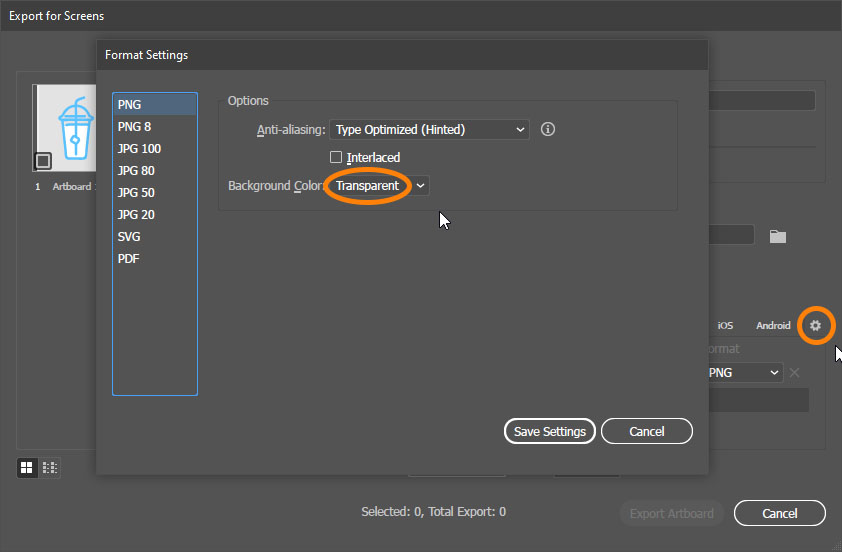
- File > Export > Export for Screens / File > Export Selection. Click the Gear icon and check that PNG background color is Transparent
- File > Export As… > PNG File. Check if Background Color is Transparent
- File > Export > Save for Web. See if Transparency checkbox is checked.
Background Artwork
What if you do have an actual background in your file? For example, the artwork you’re working on upon saving and uploading to a website turns out to have a white background where you want the website’s background to show through. First, you need to locate it it.
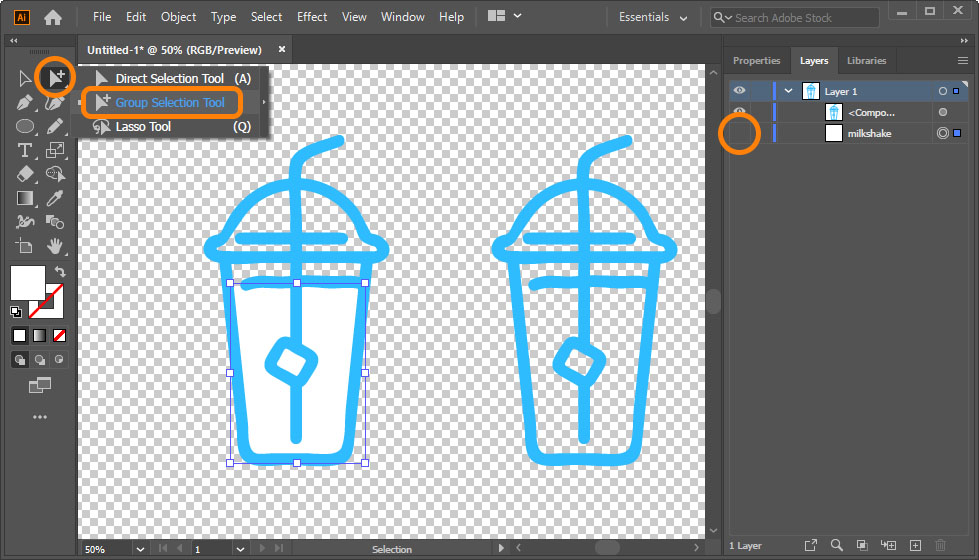
- Open the Layers panel by going to Window > Layers, or pressing F7.
- Choose Group Selection Tool from the Toolbar (alternatively, choose Direct Selection Tool (A) and hold Alt/Option), and try clicking on the area that shows to have the background you want to remove. A colored box will appear next to the layer’s name.
Note: if no object is selected, then it might be locked. Expand layers and groups by clicking on the arrow on the left and try finding one with a lock icon. Click it to unlock. If you can’t find it or there are too many, go to Object > Unlock All. Now try selecting again.
- Alt/Option-click on the arrow to the left of the layer’s icon to expand the entire hierarchy of the layer.
The object that was selected will have a colored square dot on the right that will appear bigger than the one next to the layer or group the object is in.
- Click on the eye icon on the left to turn off object’s visibility.
If you see that along with the background, some other part of the design disappears, say a stroke that was part of the object’s appearance, then you need to separate it.
Option 1: Go to Object > Expand, then click OK. Fill and Stroke are now two separate objects, delete or turn off fill.
Option 2: Click on object’s fill color on the Properties or Control panel and choose [None] swatch (white crossed with a red line).
Raster Images
Illustrator, of course is not for editing raster images and currently has no tools to remove white background from them. But you can turn it into a vector image, especially if your image is already vector-like.
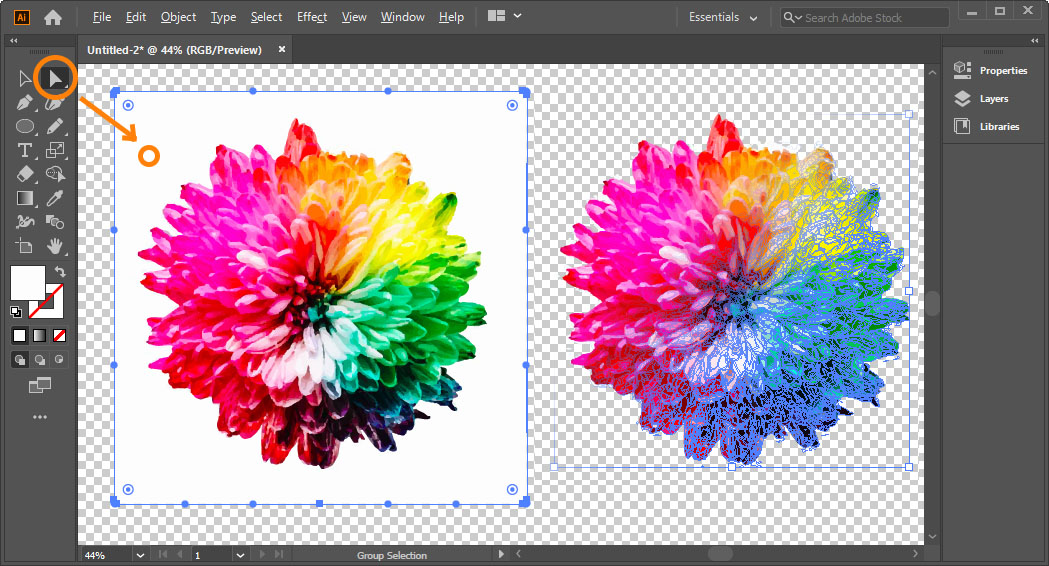
- Select image and go to Window > Image Trace. Choose High Fidelity Photo preset.
- Go to Object > Expand, click OK.
- Choose Direct Selection Tool (A). Click anywhere but the white area to reset selection, then click white area.
- Press Delete.
Tip: use Magic Wand Tool (Y) to select more than pure white areas. Double-click the tool’s icon and enter Fill Color Tolerance, usually a value around 16 works best.