Layers in Illustrator can be confusing as they are not as straightforward as say in Photoshop or any other programs. What you might understand as a ‘layer’ can be something else in Illustrator’s terminology. But let’s just cut through that and review some of the most common ways you may achieve your goal.
Layers Panel
Layers as they are understood by the Adobe Illustrator are containers for various objects that have a name, color, and several properties such as whether it’s visible, printable, etc. They are at the top of the objects’ arrangement hierarchy which can be viewed and manipulated on the Layers panel.

If you don’t see the Layers panel, go to Window > Layers menu, or press F7.
Layers have names such as Layer 1, Layer 2 by default, and their colors are represented in the objects’ vector paths when you select them.
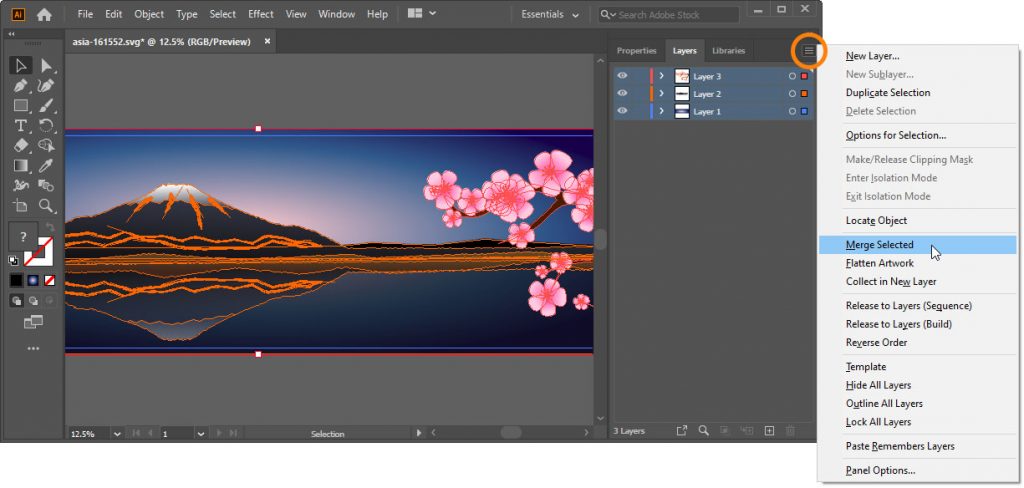
If you want to merge those layers, Ctrl/Cmd-click to select them (Shift-click to select range) then click on the Layers panel’s Options button and select Merge Selected (or Flatten Artwork to merge all the layers).
You can move objects between layers by dragging and dropping, or if you have too many of them, here’s the easy way:
- Select the artwork you want to move.
- Create a new layer or click on your target layer on the Layers panel.
Note: if you click in the area to the right of the Layer’s name, you will select that layer’s artwork, which will be indicated by a colored square dot. Having selected artwork on the target layer will prevent the following step from working. Shift-click on that dot to deselect it. - Go to Object > Arrange > Send to Current Layer.
Tip: you can click and drag colored dots to move selected artwork between layers.
Alternatively, click on the Layers Panel’s Options button and select
This will only change the arrangement of objects on the Illustrator’s layers, but they will remain separate objects. If your goal is to unite the objects into a single thing, there are different ways to do that.
Group objects
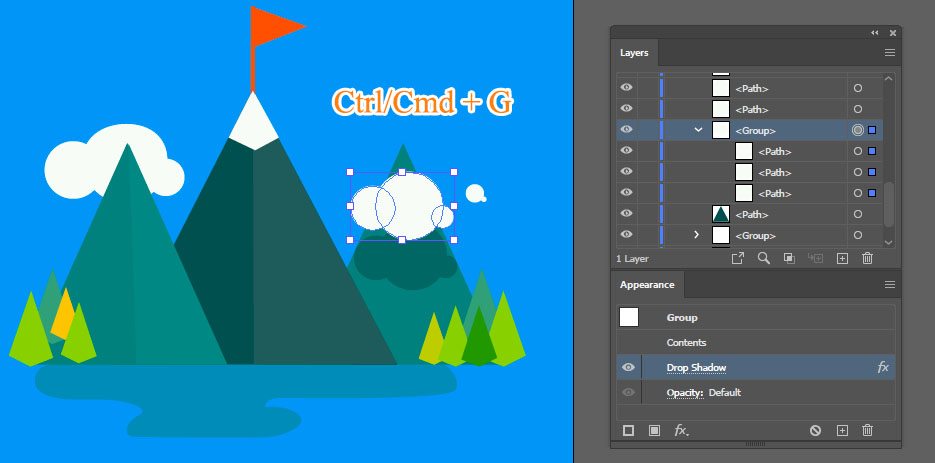
- Select objects you want to unite using Selection Tool (V). Hold Shift and click to add objects to selection.
- Go to Object > Group, or press Ctrl/Cmd + G.
This will put your objects into a group that you can review on the Layers panel. Notice some of the selected objects already might be some forms of groups themselves, forming a hierarchy.
From now on, these objects will be selected as one by the Selection Tool and can share appearance (strokes, fills, and effects). Appearance shared by the group, such as the Drop Shadow effect, will be indicated as a filled circle to the right of the Group’s name on the Layers panel. This way the effect applies to the group as a whole i.e. objects within the group won’t drop shadows on each other.
Tip: use Group Selection Tool to select objects at the bottom of the hierarchy. You can use Direct Selection Tool (A) and hold Alt/Option key. With the Group Selection Tool active, each new click selects groups higher up the hierarchy.
Pathfinder
If you need to merge two or more simple objects, such as paths into one, use the Pathfinder panel.
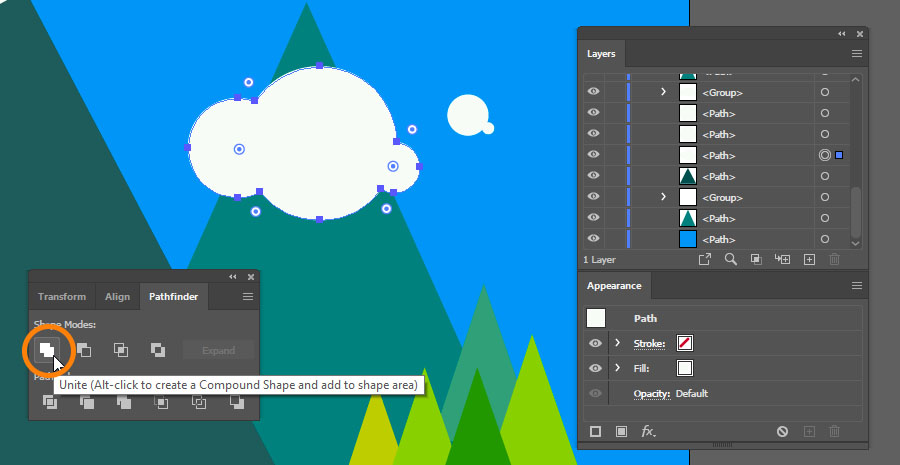
- Go to Window > Pathfinder, or press Ctrl/Cmd+Shift + F9 to bring up the Pathfinder panel.
- Select the objects you need with the Selection Tool (V). Hold Shift to add to the selection.
- Click the Unite button on the Pathfinder panel.
Objects will merge into a single path and any paths or points in the intersecting area will be removed. If your objects had different appearances, that is colors, strokes, or effects, the resulting object will assume the appearance of the object that was on the top.
If you Alt/Option-click the Unite button you will create what is called the Compound Shape (not to be confused with the Compound Path which is used for filling areas between paths, such as the outer and inner circle of the letter O). Compound Shape lets you preserve the initial paths and manipulate them dynamically while maintaining the Pathfinder effects on appearance. Click on Pathfinder’s options button to release the Compound Shape.
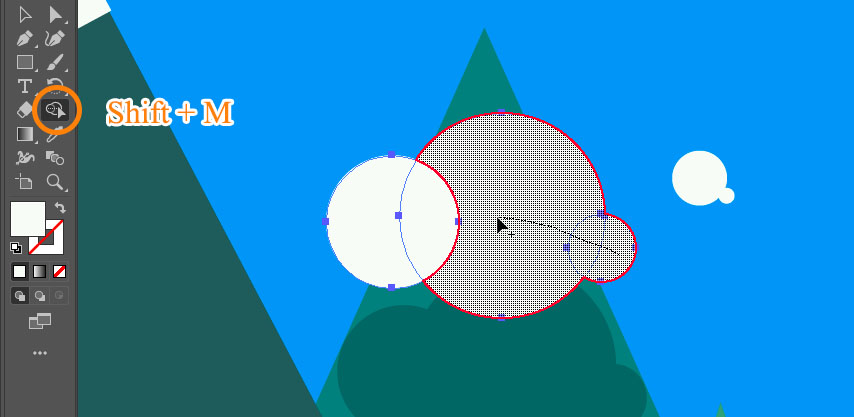
A quicker way to do Pathfinder operations is using the Shape Builder Tool (Shift + M). Simply select your paths and draw across them with the tool to unite. Hold Alt/Option to subtract.
Sometimes doing simple modifications in Adobe Illustrator seems very hard. But once you know the trick it starts to make sense. Knowing your way around raster and vector graphic tools is a solid skill in today’s world. A lot of jobs are available for creative people, so why not start a career and see where it gets you?