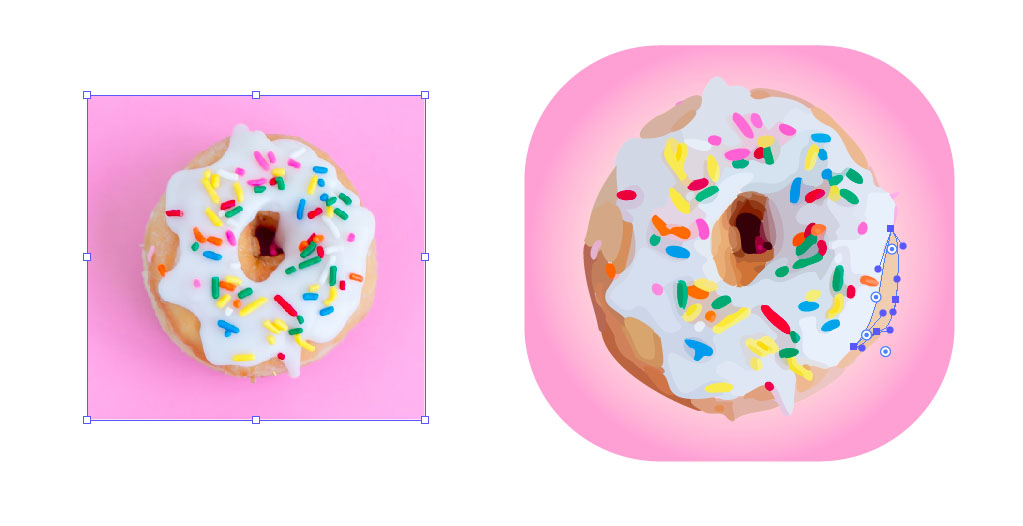
Tracing is a way convert a raster image into a vector image. Raster images consist of pixels and are good at storing rich details and complex textures of real-world pictures. But as you zoom in or resize the image those pixels start to show as square blocks or blurred spots. Vector images on the other hand are made of vector paths – mathematically described lines or curves that you can fill with color. Edges of those lines remain sharp no matter how far you zoom in and so able to preserve quality where they work best – in text, geometric shapes, designs, illustrations.
To cross over from raster to vector, you need to trace the image with vector paths, and you can do so using automatic tools or manually.
Image Trace
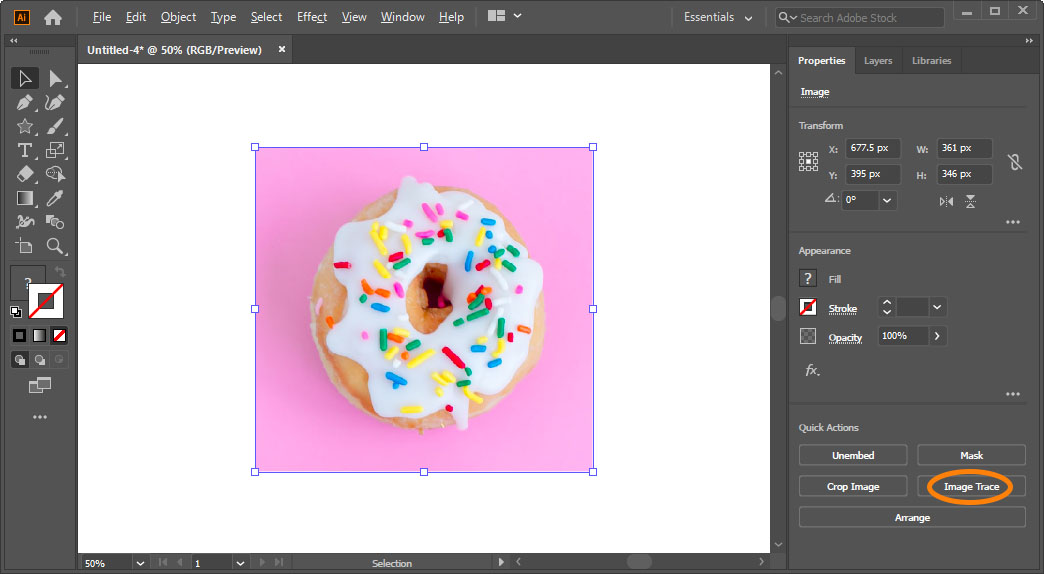
- Place raster image into your artboard. Use Edit > Place or simply drag and drop the image into Illustrator.
- Click Image Trace on the Properties or Control panel. Alternatively go to Object > Image Trace.
If you don’t see the Image Trace panel, go to Window > Image Trace. Click the arrow next to the Advanced option to expand the menu and see all the options. - Go through the presets located at the top, suitable for different types of images and see how each one works and how it adjusts the settings.
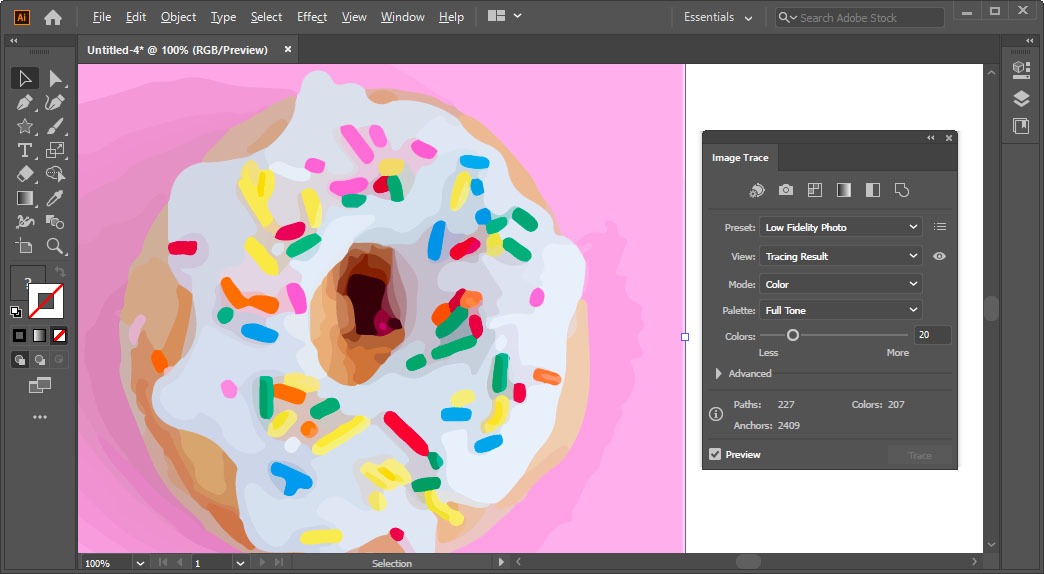
There are three main modes: Color, Grayscale and Black and White.
Photos presets use Color mode with dozens of traced colors. Low color presets are suitable for tracing logos and simple art. Line Art and Technical Drawing presets use high percentage of corners, create stroked paths and use Snapping Curves to Lines.
Hit Preview checkbox and adjust sliders to better fit your work. Try reducing the amount of Colors if your see your image only has few. Adjust Paths, Corners and Noise to find balance between smoothness and precision of the resulting trace.
Generally, the closer your image to being already a vector artwork, the better the results. Photos will generally appear as if they had a Stylized filter applied to them, a typical and recognizable traced image look. For great results, traced artworks may require adjustments and photos may need large amount of manual tracing.
Adjust tracing
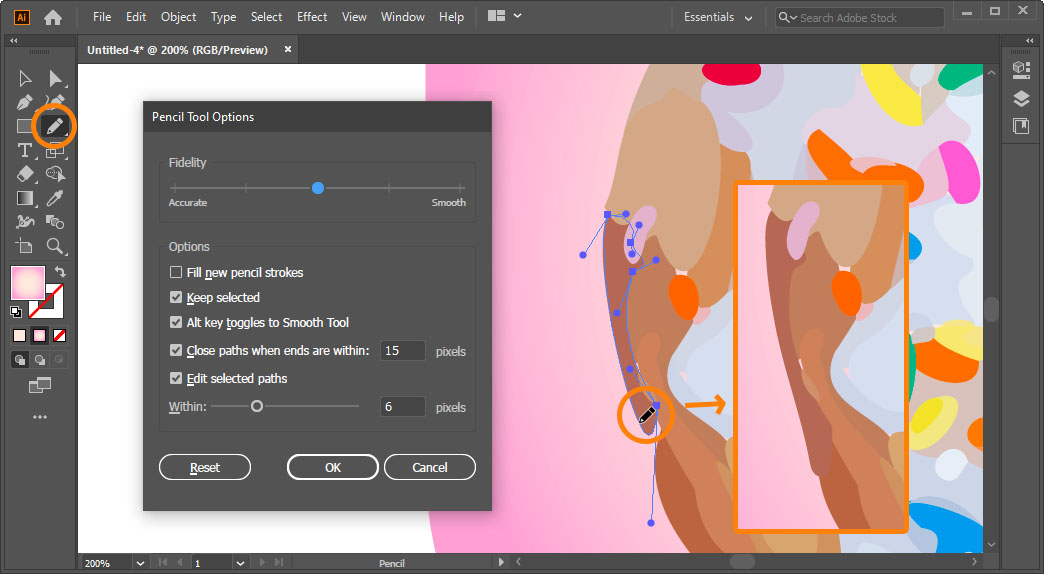
Go to Object > Expand to release vector paths from Image Trace object.
Now you can adjust and improve the results of automatic tracing, and the tools to help you with that are:
- Object > Path > Simplify. Tracing images usually generates a lot of unnecessary anchor points which you can reduce using this tool.
- Pencil Tool (N). Select artwork and hover your mouse or pen over the paths until the asterisk next to the Pencil cursor disappears. Draw over the lines to change their direction and redraw them. Hold Alt/Option to draw straight lines.
- Smooth Tool. Available separately or as an Alt option of Pencil Tool (double-click Pencil Tool icon to bring up its options). Stroke along the paths to smooth them, double-click tool’s icon to bring up options and adjust how smoothly it will smooth.
Manual Tracing
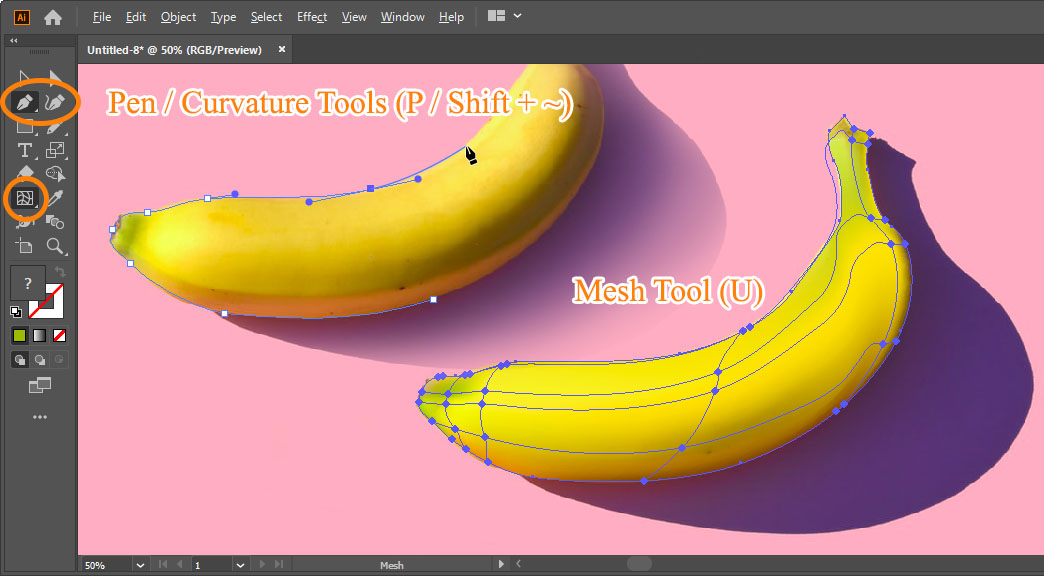
The very best looking examples of traced images you can find on the internet were created by hand. Automatic tracing may help to some extent but to achieve greatness you will need to take into your hands the tool of true professional – the Pen Tool. In combination with Gradient fills (G) and Mesh Tool (U) and a lot of time and effort you can reach photographic quality if you’re willing to go there.
Here are some tips to start you off:
- Select Pen Tool (P) and start outlining your objects.
- Click to create points, click and drag to create smooth points. Click on created points to remove them, click on a path to add points.
- As you draw out smooth points, hold Space bar to readjust its position, hold Ctrl/Cmd to make handles asymmetric, hold Alt/Option to break handles and create smoothed-corner point.
- Hold Ctrl/Cmd to temporarily switch to Direct Selection Tool and adjust any point you’ve already created.
- Hold Alt/Option to temporarily switch to Anchor Point Tool. Click on a smooth point with that tool to make it a corner point, click and drag to make a smooth point. Drag handles to break them into smoothed corners.
- Try using Pen’s newer alternative, the Curvature tool (Shift + ~). Simply click in your object’s curvature points (“peaks and valleys”), double click to make corner points.
After you’ve done outlining, use Color Picker (I) tool and click on the image to sample colors for fills or Mesh Tool’s anchor points.