Photoshop provides a variety of tools for blurring images for all kinds of purposes: blurring objects or specific parts of images, smoothing backgrounds or creating advanced effects such as tilt-shift or bokeh.
The Blur Tool
The Blur Tool acts like a brush that lets you manually blur parts of the image to the degree you want.

- Select Blur Tool on the Tools panel. It is located right below the Gradient tool and has no keyboard shortcut by default. If you see Sharpen or Smudge tool instead, click and hold left mouse button or right-click for a menu that will let you choose the Blur Tool.
- Adjust brush size by pressing square brackets [ or ] on the keyboard, or through the context menu by right-clicking on the canvas.
- Draw with your mouse or pen to blur.
You can adjust strength in the options bar or, like with other drawing tools, by using keys 1 through 0 on the keyboard, where 1 = 10%, and 0 = 100%. 0 and 1 in quick succession will give you 1%.
Blur Filters
Go to Filter menu > Blur. A list with a variety of blur filters will appear. Let’s review the most commonly used of them.

- Gaussian Blur is very simple and straightforward, you only adjust the Radius value to increase the strength of the blur. You can use values of less than 1 pixel for a more subtle blur.
- Motion Blur and Radius Blur are simple filters that generate directional blur to create a sense of captured motion.
- Smart Blur has a threshold parameter, that lets you define how big the details must be before they get blurred. This way you can smooth certain surfaces or objects, while the edges of those objects remain sharp
- Lens Blur is a complex filter which simulates camera lens. You can only use the Radius parameter and it will already help your blurred background layer appear less photoshop-ey and more like a real photo.
- Average blur, used on its own will just blur your entire image into a single color. It’s really useful in combination with selection tools, like Marquee tool, and color picker, to extract overall color of a certain area.
Blur Gallery
These are the new filters that largely come to replace the old ones and let you produce high-quality, complex blurring effects. They are located below the old Blur filters in the Filter menu.
- Field Blur is the simplest in the Gallery, try using it first to learn how Blur Gallery filters work.
- Go to Filter > Blur Gallery > Field Blur.
- A new panel will appear and a circular dot with a dial around it, called blur pin, will be added to your image.
You can adjust the blur strength using slider on the Blur Tools panel or by clicking on the dial around the blur pin.
- Click anywhere else on the image to add a new blur pin, and give it a different value, bigger, smaller, or zero.
As you can see, the blur effect transitions smoothly between the two fields, from more blurry to less or even no blur.
You can add pins, give them different values, move them around, or remove by hitting Delete key.
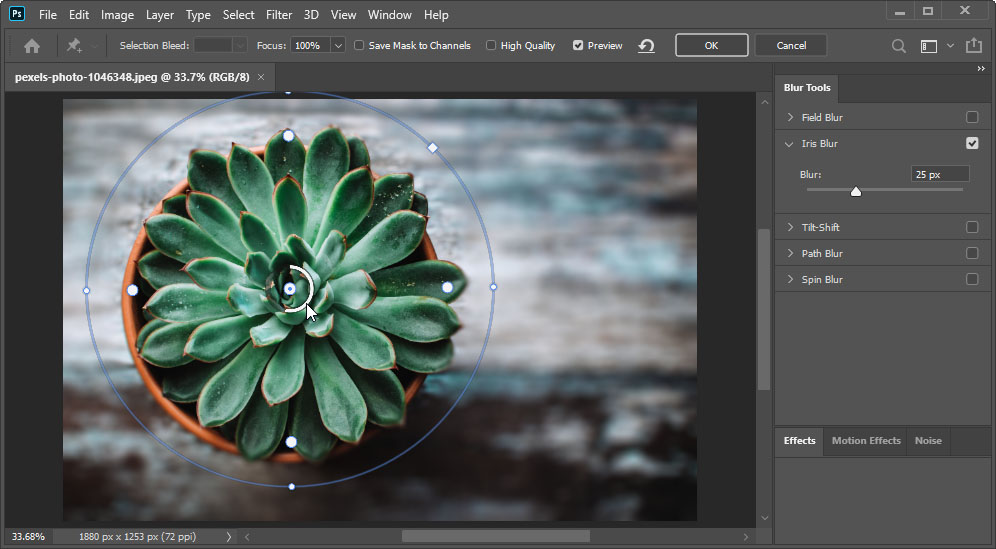
- Iris Blur creates a field that blurs everything outside it. Its blur pin has more gadgets around it that define that field’s size, shape and smoothness of transition into blurriness.
- Tilt-Shift creates a horizontal field that simulates tilt-shift effect
- Path Blur is one of the newer additions to the Blur Galley, it has paths, instead of pins, that define direction of the flow of motion blur.
Try combining different Blur tools on different layers, and, using the additional Effects panel beside Blur Tools you can add Bokeh and various motion effects, you can easily create truly impressive, complex and dynamic artwork.